Friday, March 18, 2011

Finally! A Before and After

Last weekend, Chris and I headed to a local antique shop to see if we could find a little piece of furniture for the dining room.  Ta da!  We did.  It's a cool antique place--it's a big warehouse and all of their unfinished furniture has two prices on it: the as-is price, and the finished price.  We spent more than we should have on this little piece, but it was perfect for the space so I'm okay with it.

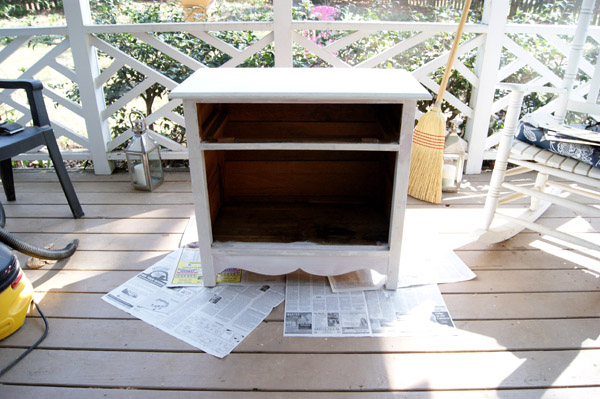
Before:  The piece was a charming Pepto-Bismol pink, chipping really really badly, and was missing the knobs on the drawer.  Despite all of that, the cabinet was actually in good shape: sturdy and well-built with no major dings or scratches.


Lots of peeling paint

In about 5 minutes with the help of a chisel and scraper, I had the entire top stripped of pink paint.  The sides, drawers, and doors took another TWO HOURS though.  UGH.

After all the peeling paint was removed and the entire piece was sanded, I primed it:


Then it was time for paint.  I used Behr Ultra in Martha Stewart's Heavy Cream (the same color as the living room).  I was completely exhaused at this point (I had painted the dining room the day before and removed 8 bags of yard waste from the yard), so I sent Chris off to pick up some hardware.  He did good too and picked out just what I wanted!


Then it was time to paint the door and side insets with the same color as the dining room walls (MS Thunderhead).  Ta da!!! 

Here's the After:


I'd still like to line the drawer with some pretty paper and then we'll store some of our china and dining room stuff in it. 

What do you think?

Thursday, March 17, 2011

I promise a Before and After tomorrow

Right now, all I'm giving you is the Before:


Awwwwwwwwesome, right?

I still have a teensy bit of work to do on it to make the doors close properly, but I'll have the During and After for you tomorrow.  You'll love it.  Promise.

Oh yeah, and Happy St. Patty's Day.  Have a green beer and some weird green food!

Wednesday, March 16, 2011

Want another slow cooker recipe?

(Correct answer: Yes)

From this cookbook, The Easiest Beef Short Ribs

1 tablespoon unsalted butter or olive oil
1 medium onion, finely chopped
3/4 cup ketchup
1/4 cup soy sauce
3 tablespoons cider vinegar
3 tablespoons brown sugar
3 to 4 pounds beef short ribs

1.  In a small skillet, heat the butter over medium heat until melted, then cook the onion, stirring until softened and golden, about 5 minutes.  Add the ketchup, soy sauce, vinegar, and brown sugar, stir until smooth, and heat for 5 minutes.

2.  While making the sauce, place the short ribs on a broiler pan and broil until well browned.  Arrange the ribs in the slow cooker.  Pour over the sauce, distributing the onions over all the ribs.  Cover and cook on low until dender and the meat starts to separate from the bone, 7 to 8 hours.

3.  Transfer the ribs to a platter.  Let the sauce cool a bit, then spoon the liquid fat off the surface and discard.  Pour the sauce over the ribs and serve immediately.

I made this recipe on Sunday, froze most of it and had some of it for dinner last night and it was delicious.  Based on the ingredients, I thought the sauce would be more barbeque-y, but it's actually more pot-roast-y.  Totally, totally delicious and super simple. 

Also, we have a pile o' cat parts:


That's all I got today.

Tuesday, March 15, 2011

A stupidly easy project

Inspired by this post, I decided to basically copy it verbatim.  So, a geode that I recently got from Home Goods for $15 just got a coat of gold paint.


I might try to see if I can remove the gold base.  Otherwise I'll just paint that gold too.  The wood just isn't doing it for me. 

It's similar to this pair of geode bookends that retails for $1,900. 


My project cost about $20, so the question is, now that I've saved $1,880 what am I going to do with all that money?!?!?  Oh, the possibilities!

Monday, March 14, 2011

I love paint

So, in addition to Operation: Yard Cleanup 2011, I painted the dining room this weekend.

Ready?  Here's the Before:

;kjaf;slkdjf;skjd;ksjdf;lk.........sorry, fell asleep because it was SO BORING.

Yaaaaaaaaaaaaaaaaaaaaaaaawn!

After taping up a bunch of color swatches, I picked one.  Thunderhead by Martha Stewart.


Ta da!  Here's the After:

What do we think?  Better, no?

I wasn't totally sure about the brown drapes with the gray-green walls, but I loooooove it now.

Bookshelf turned buffet.


I kind of want to paint everything this color, specificially the kitchen and our bedroom.

This weekend we also purchased a little cabinet to go in the corner of the dining room.  It was really hideous before but now it's not.  There's still a teeny tiny bit of work to be done on it before I share it with you fine folks, but that's coming soon.  Promise.  Kapiesh?

Friday, March 11, 2011

How To: Paint a Room

I had a conversation with a neighbor the other day who said she wanted to pick my brain about how to paint a room 'cuz she'd never done it before.  Whaaaaaa?  So, it occurred to me that since I've painted 6 rooms in the past year (living room, hallway bedroom [not sure if I ever posted this], hallway and entry, upstairs bath, sewing room, and bonus room) and I'm about to tackle the 7th today (dining room!), I've picked up some tips along the way that might be helpful to other folks.

Here goes!  To start, you'll need some tools.  You don't need a bunch of tools, just the right ones.  This should be all you need:

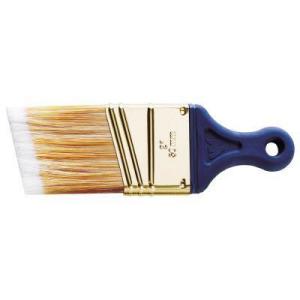
1.  A 2" angle sash brush, like this one.  Forgo the multi-pack of brushes and just get a small angle brush for cutting in the corners.  I like this one because the handle's small so it gets into small spaces easily, plus the rubber handle keeps my fingers from getting sore.  It still makes clean, sharp lines even after painting a bunch of rooms.  And the best part is that if you have a good angle brush, you won't need to tape off the ceiling and baseboards.


2.  A brush comb.  This will help clean your 2" angle brush and keep it in good condition for a long time.


3.  A roller tray and plastic liners.  You can reuse the tray and just swap out the liners for your next project.


4.  A roller and roller covers.  Get a multi-pack of roller covers so you have some on hand for your next painting project.  Unfortunately, I've never found any rollers that are all that comfortable.  Every single one I've ever tried ends up making my hands and wrists sore before I've finished painting.

5.  A tarp.  Just go ahead and get one.  You'll think you won't need one, but if you want to minimize your risk of disaster, get one.

Okay, so onto technique now.

Before heading to the hardware store to pick up your paint and supplies, estimate the square footage of the walls in your room.  Here's a paint coverage calculator for ya.  Each gallon of paint covers about 350 square feet and you'll want to know how many gallons to buy.  This seems like an unnecessary step, but I promise, if it saves you from having to drop what you're doing and drive to the store to get more paint when you run our, you'll be happy you measured.  Have I ever done this?  Truthfully, no, but EVERY. SINGLE. TIME. I run out of paint and I kick myself.  It's stupid.  So measure first.

Then once you get your supplies and paint, move the furniture away from the walls and lay your tarp down.  Oh, and change out of your normal clothes and put on some painting clothes.  You'll think you won't get any paint on your clothes, but you will, so just change them already.

Get out a flat-head screwdriver and remove the light switch plates and the outlet covers.  Now you're ready to cut in (paint) the corners and the edges around the ceiling and the baseboards and around the light switches and outlets.  Cut in about 2" so you don't have to get the roller too close to the edges and risk getting paint on the ceiling or baseboards. 

Put the brush in a zip-lock baggie and stick it in the fridge.  This'll keep the brush from drying up for now.

Once you've cut in the corners and edges, you're ready to get out the roller!  Pour some paint in the tray and load up the roller with some paint, rolling it on the tray to get the excess off.  With medium pressure, paint in large "Ws" across the wall.  Don't press the roller too hard--you'll think you're spreading the paint around better if you press hard, but you don't want to do that--you'll spread the paint too thin and you'll end up with uneven spots.  Work on only one wall at a time, making sure you have even coverage before moving on to the next wall. 

When you've gotten all the walls covered, let them dry.  Give it about an hour or so before you come back to check on it.  Once it's dry, check for uneven spots (it'll be easier to see the uneven spots once it's all dry).  You can touch up the edges with the brush or paint over large spots with a roller. 

Now you just need to clean up.  You can throw away the roller and the tray liner and rinse out the brush, using the brush comb to get the paint out.  Rinse the brush in cool water until the water runs clear, then lay it flat to dry.

Congrats!  You're DONE!

Thursday, March 10, 2011

I need this


A plain navy blue daytime dress.  The possibilities are endless and I have a feeling I'll wear this to death.  Silver jewelry; gold jewelry; red, orange, or a light green scarf; brown sandals; nude heels; dressed up with fun earrings; dressed down with a denim jacket.  I'm totally getting this.

Wednesday, March 9, 2011

Ooooh, barware!

Ever since we got our vintage decanter tags for Christmas, I've been hankering to get my hands on some vintage barware.  Here's some good looking stuff I've found on eBay and Etsy (and Furbish) of course!  It takes a bit of hunting around on eBay, but there is definitely good stuff to be had with a bit of patience.

Cordial Glasses--Looooooooove these!


Tuesday, March 8, 2011

Simple Supper

I've been trying to use my weekends to get ahead on week night meals and so far, so good!  Generally this means throwing something in the slow cooker on Saturday morning, giving it all day to get tender and delicious.  This weekend's slow cooker meal was no exception:  Slow-Cooler Chipotle Beef Tacos with Cabbage and Radish Slaw.

The recipe is from this month's Real Simple magazine and it is incredibly simple.  I totally recommend it; I'll be making it again.


Slow-Cooker Chipotle Beef Tacos With Cabbage and Radish Slaw


Ingredients

3 pounds beef chuck, trimmed and cut into 2-inch pieces
1 large onion, thinly sliced
4 cloves garlic, chopped
1 to 3 tablespoons chopped canned chipotles in adobo sauce
1 teaspoon dried oregano
2 bay leaves
kosher salt
4 cups thinly sliced cabbage (about 1⁄3 medium cabbage)
4 radishes, halved and thinly sliced
1/4 cup chopped fresh cilantro
2 tablespoons fresh lime juice, plus lime wedges for serving
12 6-inch corn tortillas
sour cream, pickled jalapeño peppers, and hot sauce, for serving

Directions
1. In a 4- to 6-quart slow cooker, toss together the beef, onion, garlic, chipotles, oregano, bay leaves, and 1 teaspoon salt.
2. Cover and cook until the beef is very tender, on low for 7 to 8 hours or on high for 3 ½ to 4 hours (this will shorten total cooking time).
3. Twenty minutes before serving, heat oven to 350° F. In a large bowl, toss together the cabbage, radishes, cilantro, lime juice, and ¼ teaspoon salt. Wrap the tortillas in foil and bake until warm, 5 to 10 minutes.

4. Transfer the beef to a medium bowl (reserve the cooking liquid) and shred, using 2 forks. Strain the cooking liquid through a fine-mesh sieve into the bowl with the beef and toss to combine.
5. Fill the tortillas with the beef and slaw. Serve with the sour cream, jalapeños, hot sauce, and lime wedges.

Monday, March 7, 2011

Weekend Recap

Unfortunately I don't have a whole lot of exciting Before and After pics for you all this weekend, seeing as it was Yard Cleanup and Finishing Unfinished Projects Weekend.  Good times around here!  I filled up 6 yard waste bags full of leaves, weeds, and branches.  There's still a ton left to do, but I'm not sure the city will pick up any more garbage bags, so I'll be back at it again next week!  Hooray for home-ownership.  Sunday it rained all day, so I spent the day touching up the paint jobs in the upstairs bonus room and the hallway bedroom.  I want to paint the dining room next weekend, but really needed to wrap up some loose ends before tackling yet another project.

Anyway, this weekend we put the door knocker on the door:


I bought numbers to put on the door, but then realized that they were the stick-on variety, which won't work in the long run, so back they went.  Still need to pick out some new ones and it seems like there aren't many options out there, so we'll see!

I mixed things up a little in the entry way while I was at it.  The foo dogs that had been on the mantel are now in the entry:


And the Cardiff print got moved to the manel, along with a new orchid.  Hooray!  I'm still not totally sure what to do with the brick.  I don't 100% love it, but I'm not totally sure I want to paint it either.  Decisions, decisions!  For now, it'll stay as-is until I figure it out.


Hope you all had a great weekend!

Friday, March 4, 2011

Hooraaaaaaaaaaaaay weekend!

This week has drug on, hasn't it?  On Tuesday, I thought it was Wednesday and I never really got set straight for the rest of the week.  Anyway, today I'm going out to lunch with one of my favorite people and we shall discuss dining room colors.  Although there will be no dining room painting this weekend.  (That's next weekend.)

This weekend we'll be touching up paint in the hallway and the upstairs bonus room and also cleaning up the yard.  There are many dead leaves to be raked, hedges to be trimmed, and weeds to be pulled, all in preparation for some planting over the next few weeks.  In a few weeks, our yard will TOTALLY look like this:


Orrrrrrrrrrrrrrrr, that's Butchart Garden when we visited last year.

Hope you have a wonderful weekend!!!

Thursday, March 3, 2011

Look what I made!

It's been ages since I made any jewelry, but last night I decided to throw a few pieces together with some materials I already had and a few findings.

A seed pearl bracelet: 


I've had these leaves for awhile and finally made them into earrings with a few pieces of chain.  I'm still not 100% thrilled with how they turned out, but I'll see if I can make some improvements to them.


I can only wear clip-on earrings (a stupidly long story) and since there aren't all that many clip-ons out there that are suitable for young-folk, I usually end up just making my own.  So there!

Wednesday, March 2, 2011

Dining Room Colors

So, last Friday I posed the question: what color should I paint our dining room?  The beige-ish color isn't really doing much for me.  It's not that it's bad, but it's just not fantastic either.  Here's what it looks like today:


See?  It's...fine. 

Anyway, I was originally thinking green, like this:


But I think those are too saturated for what I'm after.  Then I was thinking pink, but not totally sold on it.  So my friend April suggested a moody, mossy, brownish-green and I picked up some swatches.  I taped them up to the wall to see what they look like in the light and immediately ruled out the pink (too light).


But I think I've stumbled upon The Color:


(Yeeeeeeah, Photoshopping skillz!)  It's Thunderhead by Martha Stewart--a moody, sexy (?) brownish-grayish-green and I think it'll be just all around good.  I'm NOT painting it this coming weekend though--I've decided I'm spending this weekend finishing some unfinished projects (I'm QUEEN of finishing 95% of things), so I'll be touching up other painting projects here and there and doing some yard cleanup.  Good times.

FYI, I've unintentionally amassed quite a stack of Martha Stewart paint swatches.  Oops!


Tuesday, March 1, 2011

Spring is here!

(Watch, we'll get hit by a huge snowstorm next week as a result of me posting that title.)  We're not fully out of the woods until mid-March, but with temperatures in the mid-70's on Sunday and close to 80 on Monday, I'd say we're on the right track.  Any cold spell we get from now until late September will be just a fluke.

I'm pretty excited about that.


In the next few weeks the azaleas, dogwoods and tulips will start blooming.  We'll get a coating of obnoxious, pervasive yellow pollen at some point, but I'll get over it.  If it means grilling outside, hanging out on the screened in porch, and planting flowers, I'm quite happy.
Related Posts Plugin for WordPress, Blogger...