Tuesday, December 28, 2010

Snow

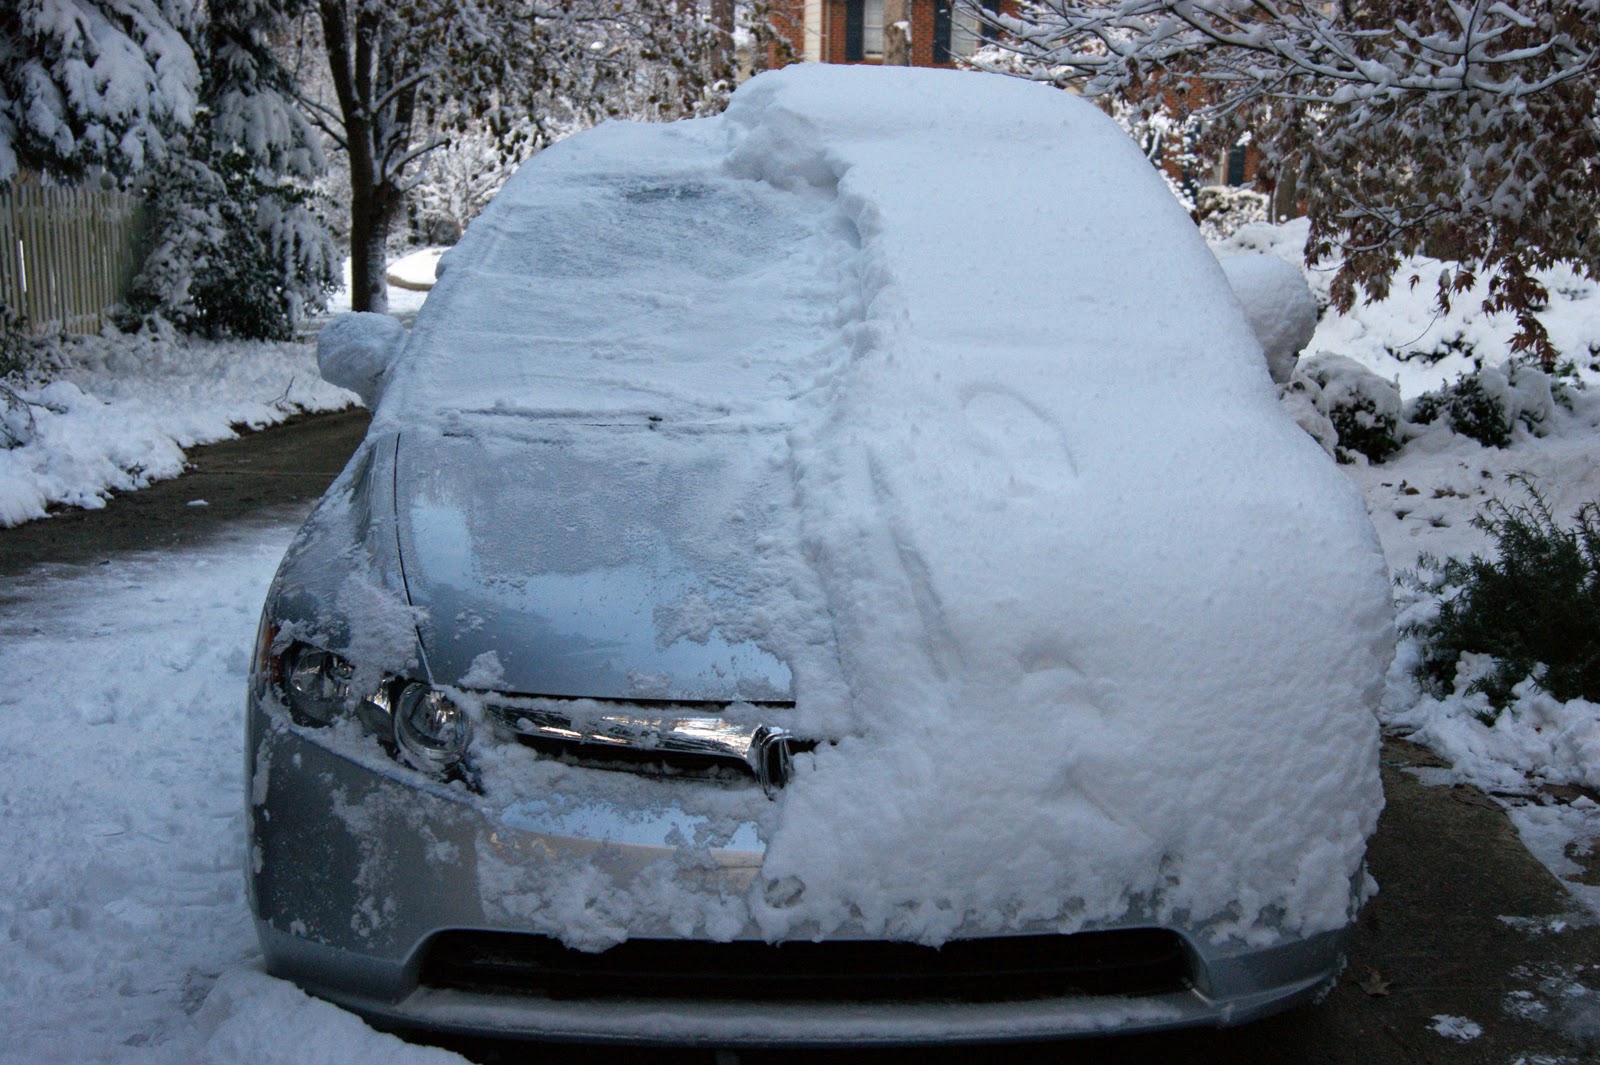
I don't know if you've heard, but the east coast got one hell of a snow storm this past weekend.  It started snowing a bit on Saturday night and we went to sleep with a light dusting, but woke up on Sunday to this:


That is a LOT of snow for us in North Carolina.  Luckily we didn't have anywhere we had to go on Sunday, so we just enjoyed the scenery.  We did some sledding with the neighbors, built a snowman and took a bunch of photos with the sweet new camera that my brother-in-law got us for Christmas.  I'm still getting the hang of the camera and Photoshop Elements, so I'm hoping my photos improve over time, but for now, here's what I've got:


Our house looks nice!

Frosty may have had some brandy punch...

Our cul-de-sac on Monday morning.  Made for some fun driving!


There's a car in here somewhere!

Monday, December 27, 2010

Never Let Me Go


I just finished Never Let Me Go last week and thought I'd share my thoughts on this bizarre book (and I mean "bizarre" in a good way).  I say it's bizarre because the premise of the book is basically science-fiction, but the book isn't at all science-fiction-y.

The story takes place in the late 1990's at an English boarding school where the children are raised in isolation from infant-hood until their late teens, when their lives take on their ultimate purpose (which I won't share in case you want to read the book, but I will say that it's totally messed up). 
The story follows three characters (Ruth, Tommy, and Kathy) from childhood into adulthood and chronicles their friendship and romance with one another.  The characters are incredibly real--there were several times where I felt like I had met Ruth before--and that's what makes the book really come to life.  Kathy is kind and thoughtful and a bit of a follower; Tommy is trying to reign in his hot-headed nature; and Ruth is a popular, bossy know-it-all who's desperate to appear more mature than she actually is. 

The pace is on the slow side and a bit heavy, but it's well-written and incredibly thought-provoking.  I definitely recommend it if you're in the mood for something different.  Also, someone recently made a movie adaptation of Never Let Me Go and I'm anxious to see it.  Looks like I missed it in the theaters, but I'm definitely going to watch it when it comes out on Netflix.

Friday, December 24, 2010

Thursday, December 23, 2010

Outfit of the Week

I really liked the outfit I wore to work yesterday, so I had to share. This is not the most flattering angle ever, but whatever. It's also a bit hard to tell from these photos, but the skirt is tweed with navy, gray, and sparkly silver bits in it, so the tank I'm wearing is navy, not black, and the sweater is gray. 

The boots are I think 7-8 years old and I still like them, but I think I need different boots for this outfit in the future.  Something a bit more slouchy, I think.  


Now I need to get a new pair of boots!  I'll see if I can find anything while I'm out and about today.  I mean, it's Christmastime and I've been very very good this year and I need a present for myself, right?  Right.

Wednesday, December 22, 2010

Homemade Marshmallows

It's that time of year again:  marshmallow-making time!  I recently made a batch of peppermint marshmallows which are always good.  Then I decided to try my hand at making chai marshmallows.  I follow the Martha Stewart recipes and always make a double batch--I figure if I'm goint o go through the work of making marshmallows, I should just go ahead and make a bunch.  They keep pretty well too.


Makes about 16


Ingredients:
Nonstick cooking spray
3 (1/4-ounce) packages unflavored gelatin
1/2 cup cold water
2 cups granulated sugar
2/3 cup light corn syrup
1/4 teaspoon coarse salt
1/4 teaspoon pure peppermint extract
Confectioners' sugar, sifted, for coating

Directions:

1.  Lightly spray a 9-by-9-inch baking pan with cooking spray. Line pan with plastic wrap, leaving a 2-inch overhang on all sides; set aside.

2.  In the bowl of an electric mixer fitted with the whisk attachment, sprinkle gelatin over 1/2 cup cold water; let stand for 10 minutes. In a medium saucepan, combine sugar, corn syrup, and 1/4 cup water. Place saucepan over medium-high heat and bring to a boil; boil rapidly for 1 minute (until the candy thermometer reads 238).


This is really hot and really sticky when it's 238 degrees, so be extra careful.

3.  Remove from heat, and, with the mixer on high, slowly pour the boiling syrup down the side of the mixer bowl into gelatin mixture. Add salt and continue mixing for 12 minutes.


4.  Add peppermint extract and mix until well combined. Spray a rubber spatula or your hands with cooking spray. Spread gelatin mixture evenly into pan using prepared spatula or your hands. Spray a sheet of plastic wrap with cooking spray and place, spray side down, on top of marshmallows. Let stand for 2 hours.

5.  Carefully remove marshmallows from pan. Remove all plastic wrap and discard. Cut marshmallows into 2-inch squares using a sprayed a sharp knife. Place confectioners' sugar in a large bowl. Working in batches, add marshmallows to bowl and toss to coat. Marshmallows can be stored in an airtight container up to 3 days.


Chai Marshmallows
(Using the Martha Stewart Vanilla Marshmallow recipe as a base)
Makes about 16


Ingredients:
Nonstick cooking spray
3 (1/4-ounce) packages unflavored gelatin
1/2 cup cold water
5 chai teabags
2 cups granulated sugar
2/3 cup light corn syrup
1/4 teaspoon coarse salt
1 teaspoon pure vanilla extract, plus 1 vanilla bean, scraped
Confectioners' sugar, sifted, for coating

Directions:

My notes:  Before beginning, make a super concentrated chai tea to flavor the marshmallows.  To do this, steep teabags in boiling water for about 5 minutes then remove the teabags and set the tea in the refrigerator to cool.  When I made this, I had doubled the marshmallow recipe and tried using 15 bags of chai.  I think they turned out a bit too chai-y (there I go again making up words!) and so I think 5 teabags for one batch of marshmallows would be fine.

Here's what 15 bags of chai looks like together, by the way.


Extra super concentrated chai.  Mmmmm...yummers.

1.  Lightly spray a 9-by-9-inch baking pan with cooking spray. Line pan with plastic wrap, leaving a 2-inch overhang on all sides; set aside.

2.  In the bowl of an electric mixer fitted with the whisk attachment, sprinkle gelatin over 1/2 cup cold water tea; let stand for 10 minutes. In a medium saucepan, combine sugar, corn syrup, and 1/4 cup water. Place saucepan over medium-high heat and bring to a boil; boil rapidly for 1 minute (238 degrees).


This is what the chai concentrate looks like with gelatin added.  I promise it gets better from here.


3.  Remove from heat, and, with the mixer on high, slowly pour the boiling syrup down the side of the mixer bowl into gelatin mixture. Add salt and continue mixing for 12 minutes.

4.  Add vanilla extract and vanilla bean seeds; mix until well combined. Spray a rubber spatula or your hands with cooking spray. Spread gelatin mixture evenly into pan using prepared spatula or your hands. Spray a sheet of plastic wrap with cooking spray and place, spray side down, on top of marshmallows. Let stand for 2 hours.

5.  Carefully remove marshmallows from pan. Remove all plastic wrap and discard. Cut marshmallows into 2-inch squares using a sprayed sharp knife. Place confectioners' sugar in a large bowl. Working in batches, add marshmallows to bowl and toss to coat. Marshmallows can be stored in an airtight container up to 3 days.

I am by no means a tidy cook (duh).

Both versions are excellent in dark sipping chocolate.  Coating the marshmallows in chocolate also proves to be quite tasty, but I've yet to really master this art yet.  More research is needed.

Anyway, if you've never made marshmallows before, I highly recommend it.  It's a lot of fun (and a bit messy) and the results are totally different than what you buy in the store.

Tuesday, December 21, 2010

The painting project from hell

This weekend I tackled a project I'd been putting off for several months: painting the bonus room.  I knew it was going to be a bitch and I was totally right (woohoo?).  The bonus room takes up most of the length of the house upstairs and to matters even more fun, it has a stairwell, three dormer windows, and some other strange corners to paint around.  Plus acres upon acres of unpainted, unfinished molding.

Before:


I started off several months ago by painting the windows and the baseboards.  Griz was very helpful:


So I taped down the carpet around allllllllllllll the molding, then primed and painted (2 coats).  UGH.


I chose the color Chinchilla by Martha Stewart for the walls and spent several hours on Saturday cutting in all the corners and edges.  Again...UGH.


I got an edging tool that screwed right on to an extension rod and was able to paint the edges around the ceiling on the stairwell wall.  Still not sure how to go about painting those weird little cut-out windows, but I'm sure I'll figure it out.

Annnnnnnnnnnnyway, after 6 HOURS of painting on Sunday, I finally finished.  There's a bit of touching up to do here and there and a strip of baseboard that I hadn't gotten to yet, but for the most part, it's DONE.  WHEW.


In some of the photos the color's reading a bit lavender-ish, but it's grey in person.  Promise.

Monday, December 20, 2010

Painting, Painting and More Painting

A few weeks ago, I painted the hallway bedroom which will eventually be a kid's room when we have one (and no, this whole post isn't an announcment of any sort, so don't get all excited there).  I've loved the idea of a navy blue room since I saw this David Netto-designed bedroom about a year or so ago:


I love the look of grasscloth wallpaper, but figured that wouldn't be the best bet for a kid's room, so I used the high gloss navy blue paint leftover from the upstairs bathroom makeover on three of the walls.  The fourth wall will eventually be the same cream that's in the living room.


I found a great mirror at HomeGoods last weekend that will eventually get hung between the windows and the cream wall will eventually have a gallery-style art arrangement.  Check out our home's color palette and you can see I'll also bring in pops of pumpkin and turquoise (sounds weird, but it's not--promise).

So there you have it.  Tomorrow I'll post pics of the massive painting project from this weekend. 

Friday, December 17, 2010

Punch Drunk?

Remember how last week I wrote about how I was going to make a super classy brandy punch for my cookie exchange party for a ton of strangers I'd never met?  Here was the recipe from the Savoy Cocktail Book:

Juice of 15 Lemons

Juice of 4 Oranges
1 1/4 pounds Powdered Sugar
1/2 pt. Curacao
1 Glass Grenadine
2 Qts. Brandy
1 to 2 Qts. Sparkling Water

Seems easy enough, right?  Mmmhmmm.  Well, we had a few issues with it.  Surprisingly, none of the issues had to do with the quantity of brandy:


That's a fair amount of alcohol, wouldn't you say?

Okay, so the problem with this recipe is that the cocktail book was written in the 1920's and my hunch is that both grenadine and curacao have changed a bit since then.  Why do I think this?  Because I have my doubts that this is what The Savoy served back in the day:


My theory is that back in the 1920's, curacao probably wasn't a violent blue color.  No idea what color it was, but I think if the recipe had called for triple sec, the punch would have been a pretty reddish color instead of a weird greenish/bluish/brown.

My second theory is that grenadine must have had a lot less sugar back in the day.  The 1 and 1/4 POUND(!) of powdered sugar seems like (and is) a LOT.  With the amount of sugar already in the punch, the powdered sugar didn't dissolve fully, so when I stirred the punch, it became really cloudy, so then I was left with a cloudy, brownish/bluish/greenish punch, which I still totally served.  Happy holidays everyone!

It still tasted fantastic but next time I make this, I'll use triple sec instead of blue curacao and start with 1/2 pound of powdered sugar and add from there. 

Thursday, December 16, 2010

Merry and Bright

I wrapped all my Christmas gifts this year for less than $7.  How?  Kraft paper.  I've used it for years to wrap presents and I love it.  1) It's cheap.  2) You can write on it.  3) It's cheap.  4) You can use it for birthdays, Christmases and every other gift giving occasion.  5)  You can use any ribbon or string to decorate it and it still looks pretty.  6)  It's cheap.

Did I mention it's cheap?  As in like $4 for a shit-ton*.

See?  Pretty!

I decorated my sister-in-law's package with a vintage brooch on metallic green ribbon.  Simple and pretty.

I used two colors of ribbon on this one.  Gettin' fancy, now!

Wanna see our tree?  (Yessssssss.)

Isn't it cute?  I really wanted a white tree and decided to decorate it quirkily**.  I'm hoping that this weekend I can get around to making a tree skirt.  Out of felt, of course.

Decorations include some large green ornaments, some purple garland, purple squiggly thingies, purple present toppers (using twist ties to attach them to the tree), and some green sparkly decorative things.  There's also a random teal bow on the tree and I'm going to add some more of those this weekend too.

So that's Christmas around our place.  Whatcha got going on at your place this year?

* Shit-ton is the technical term for it.  In case you were wondering.

**  Quirkily is also a technical term.

Wednesday, December 15, 2010

Candied Orange Peels

For my cookie party the other day, I also made some candied orange peels.  I can't find the exact recipe I used (which is driving my type-A self craaaaaaaaaazy), but this one from Epicurious will do.  These took awhile to make, but most of it was hands-off time.  They're ridiculously simple and I'll definitely make them again. 


Photo from Dreamy Dish


Note:  It takes a day or two for the peel to dry, so plan ahead.  (I did not, whoopsies!)

Yield: Makes about 2 cups

2 large oranges, 1/4 inch of top and bottom cut off  (I used 4 oranges)
4 cups sugar, divided
3 cups water


Cut peel on each orange into 4 vertical segments. Remove each segment (including white pith) in 1 piece. Cut into 1/4-inch-wide strips. Cook in large pot of boiling water 15 minutes; drain, rinse, and drain again.  (The recipe I used said to cook for 30 minutes each time.)

Bring 3 cups sugar and 3 cups water to boil in medium saucepan over medium heat, stirring to dissolve sugar. Add peel. Return to boil. Reduce heat; simmer until peel is very soft, about 45 minutes. Drain.

Toss peel and 1 cup sugar on rimmed baking sheet, separating strips. Lift peel from sugar; transfer to sheet of foil. Let stand until coating is dry, 1 to 2 days. DO AHEAD: Wrap and freeze up to 2 months.

Tuesday, December 14, 2010

Spoon Cookies!

This weekend we hosted a cookie exchange party for the entire neighborhood so we'd have a chance to meet all the neighbors.  The idea was to come with four dozen cookies and leave with four dozen cookies.  Somehow we ended up with somewhere around 10 dozen cookies, which is a bit more than I wanted, but I'm not complaining: we moved into a neighborhood with excellent bakers.

I don't really have a cookie recipe that's "my" recipe, so I decided to try something new.  I had downloaded the Epicurious app for my new Droid phone the other day and a quick search for "cookies" yielded this result:


Photo from epicurious.com

2 sticks (1 cup) cold unsalted butter, cut into pieces
3/4 cup sugar
2 teaspoons vanilla
2 cups all-purpose flour
1 teaspoon baking soda
1/8 teaspoon salt, slightly rounded
1/3 cup fruit preserves (your choice)

Special equipment: a deep-bowled teaspoon (not a measuring spoon)


Make dough:

Fill kitchen sink with about 2 inches of cold water. Melt butter in a 2- to 3-quart heavy saucepan over moderate heat and cook, stirring occasionally, until butter turns golden with a nutlike fragrance and flecks on bottom of pan turn a rich caramel brown, 10 to 12 minutes. (Butter will initially foam, then dissipate. A thicker foam will appear and cover the surface just before butter begins to brown; stir more frequently toward end of cooking.) Place pan in sink to stop cooking, then cool, stirring frequently, until butter starts to look opaque, about 4 minutes. Remove pan from sink and stir in sugar and vanilla.

Whisk together flour, baking soda, and salt in a small bowl and stir into butter mixture until a dough forms. Shape into a ball, wrap with plastic wrap, and let stand at cool room temperature 1 to 2 hours (to allow flavors to develop).


Form and bake cookies:

Put oven rack in middle position and preheat oven to 325°F.

Press a piece of dough into bowl of teaspoon, flattening top, then slide out and place, flat side down, on an ungreased baking sheet. (Dough will feel crumbly, but will become cohesive when pressed.) Continue forming cookies and arranging on sheet. Bake cookies until just pale golden, 8 to 15 minutes. Cool cookies on sheet on a rack 5 minutes, then transfer cookies to rack and cool completely, about 30 minutes.


Assemble cookies:

While cookies cool, heat preserves in a small saucepan over low heat until just runny, then pour through a sieve into a small bowl, pressing hard on solids, and cool completely.

Spread the flat side of a cookie with a thin layer of preserves. Sandwich with flat side of another cookie. Continue with remaining cookies and preserves, then let stand until set, about 45 minutes. Transfer cookies to an airtight container and wait 2 days before eating.


Cooks' notes:

Dough can be made 12 hours before baking and chilled, covered. Bring to room temperature to soften slightly before forming cookies, about 30 minutes.  Cookies keep in an airtight container at room temperature 2 weeks.


My notes: 

These cookies are amaaaaaaaaaaazing.  Simple, but buttery and full of flavor.  Plus, browning the butter made the house smell absolutely incredible.  I'll definitely make these again.

Monday, December 13, 2010

Whew!

Yesterday we hosted a cookie exchange party for the entire neighborhood, so I'm a bit behind on blogging.  Of course I completely forgot to take pictures, but check back tomorrow for recipes!

Friday, December 10, 2010

Pleased as Punch

I think punch is making a comeback.  The cover story on the current issue of Imbibe Magazine (which is awesome, by the way) is all about punch and I've seen punch recipes turning up all over the place lately, which is enough evidence in my book to call it a comeback.  I can't remember the last time I saw punch at a party (at least not when it wasn't being served directly out of a cooler/trashcan and its main ingredients weren't cough syrup and/or Everclear). 

Anyway, so if punch isn't making a comeback already, I'm going to help it along by making a brandy punch to serve this weekend at my cookie exchange party.  I've invited the whole neighborhood over on Sunday afternoon and I'll serve some non-alcoholic sparkling cider, prosecco and brandy punch.  Nibblies will include spanikopita, bruschetta, artichoke dip, and baked brie.  Punch will be served in my grandmother's punch glasses (which I'd take a picture of, but that would require getting up and well, no.)

Brandy Punch from The Savoy Cocktail Book:

Juice of 15 Lemons
Juice of 4 Oranges
1 1/4 pounds Powdered Sugar
1/2 pt. Curacao
1 Glass Grenadine
2 Qts. Brandy
1 to 2 Qts. Sparkling Water

I'm going to make it well ahead of time, so I won't be stuck pouring drinks or anything at the party.  And that will make me...wait for it...wait for it...pleased as punch!  HA!

Thursday, December 9, 2010

Master Bedroom Inspiration

Saw this picture posted on the Lonny Blog the other day and fell in luuuuuuuuuuurve.


I love that the look is on the masculine side.  I don't love frilly master bedrooms--it's a guy's space too, you know?  Anyway, the folks at Lonny did a fabulous post about how to create this look for less and I think I'm going to work on interpreting the look for our bedroom.  I'll pass on the wrestler photo, but keep the faux fur pillows for the fall and winter.  Obviously there's no way I can afford a Hermes blanket, but there are a lot of wool blankets out there that would fit the bill.

For the spring/summer, I'd swap out the fur pillows for some colorful crewel pillows and throw on a cream matte lasse (sp?) instead of the wool blanket.


This bedroom (can't remember the source) also hits similar notes.


It's warm, cozy, and masculine in a really good way.  Luckily, we're most of the way there with the master bedroom:  we'll just need some art, a mirror, and a few new bedding pieces.  Easily done for just a few hundred bucks. 

After the holidays I'm going to finish up the living room and then it's on to the master bedroom.  Wheeeee!

Wednesday, December 8, 2010

She Says/He Says

She (meaning me, duh) says yes:


Husband says no.  I think he said they looked too "space-aged" or something to that effect. 

I think two would look fabulous in our living room.  But on the other hand, they're $200 each and I really don't feel like paying $400 for a pair of side tables.  Any other ideas? 
Related Posts Plugin for WordPress, Blogger...