I had a conversation with a neighbor the other day who said she wanted to pick my brain about how to paint a room 'cuz she'd never done it before. Whaaaaaa? So, it occurred to me that since I've painted 6 rooms in the past year (
living room, hallway bedroom [not sure if I ever posted this],
hallway and entry,
upstairs bath,
sewing room, and
bonus room) and I'm about to tackle the 7th today (dining room!), I've picked up some tips along the way that might be helpful to other folks.
Here goes! To start, you'll need some tools. You don't need a bunch of tools, just the
right ones. This should be all you need:
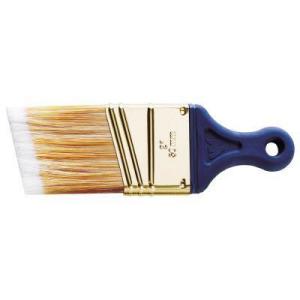
1. A 2" angle sash brush, like
this one. Forgo the multi-pack of brushes and just get a small angle brush for cutting in the corners. I like this one because the handle's small so it gets into small spaces easily, plus the rubber handle keeps my fingers from getting sore. It still makes clean, sharp lines even after painting a bunch of rooms. And the best part is that if you have a good angle brush, you won't need to tape off the ceiling and baseboards.
2. A
brush comb. This will help clean your 2" angle brush and keep it in good condition for a long time.
3. A
roller tray and
plastic liners. You can reuse the tray and just swap out the liners for your next project.
4. A
roller and
roller covers. Get a multi-pack of roller covers so you have some on hand for your next painting project. Unfortunately, I've never found any rollers that are all that comfortable. Every single one I've ever tried ends up making my hands and wrists sore before I've finished painting.
5. A tarp. Just go ahead and get one. You'll think you won't need one, but if you want to minimize your risk of disaster, get one.
Okay, so onto technique now.
Before heading to the hardware store to pick up your paint and supplies, estimate the square footage of the walls in your room. Here's a
paint coverage calculator for ya. Each gallon of paint covers about 350 square feet and you'll want to know how many gallons to buy. This seems like an unnecessary step, but I promise, if it saves you from having to drop what you're doing and drive to the store to get more paint when you run our, you'll be happy you measured. Have I ever done this? Truthfully, no, but EVERY. SINGLE. TIME. I run out of paint and I kick myself. It's stupid. So measure first.
Then once you get your supplies and paint, move the furniture away from the walls and lay your tarp down. Oh, and change out of your normal clothes and put on some painting clothes. You'll think you won't get any paint on your clothes, but you will, so just change them already.
Get out a flat-head screwdriver and remove the light switch plates and the outlet covers. Now you're ready to cut in (paint) the corners and the edges around the ceiling and the baseboards and around the light switches and outlets. Cut in about 2" so you don't have to get the roller too close to the edges and risk getting paint on the ceiling or baseboards.
Put the brush in a zip-lock baggie and stick it in the fridge. This'll keep the brush from drying up for now.
Once you've cut in the corners and edges, you're ready to get out the roller! Pour some paint in the tray and load up the roller with some paint, rolling it on the tray to get the excess off. With medium pressure, paint in large "Ws" across the wall. Don't press the roller too hard--you'll think you're spreading the paint around better if you press hard, but you don't want to do that--you'll spread the paint too thin and you'll end up with uneven spots. Work on only one wall at a time, making sure you have even coverage before moving on to the next wall.
When you've gotten all the walls covered, let them dry. Give it about an hour or so before you come back to check on it. Once it's dry, check for uneven spots (it'll be easier to see the uneven spots once it's all dry). You can touch up the edges with the brush or paint over large spots with a roller.
Now you just need to clean up. You can throw away the roller and the tray liner and rinse out the brush, using the brush comb to get the paint out. Rinse the brush in cool water until the water runs clear, then lay it flat to dry.
Congrats! You're DONE!